Ego the Living Planet and How to Make a Great Background
Leveraging Mecabricks, Blender and NASA images, I was able to render this picture of Marvel’s Ego.
Last weeks, I ran across this build by changewing1 of the living planet. Mecabricks is a great community for such finds. Plus, I needed something to tax my old computer while trying out denoising feature in Blender. Stars aligned—pun intended, and I was off to render my next image. Keep reading to see how I did it.
 Ego by changewing1 by Steven Reid, on Flickr
Choosing the subject.
To be honest, I’m not all that familiar with Guardians of the Galaxy outside of the movies. When I ran across the model, I knew about Ego, but only in passing. I did a bit of research on the subject to better understand who he is. This version looks closer to the comics than the recent movie—which I haven’t seen as of this posting.
The model itself is quite striking. The bright colors work well and I like the way different colored continents and craters. The yellow eyes convey the evil of the subject, while the beard tells you his age. Add in a few orbiting moons completes Changewing1’s excellent design.
But, as I rendered the image I realized that you can’t build it. For example, the nose bridge digs into the studs on the eyes. The angled pieces below the nose merge into each other. The pony tails that make up the beard look doable, but are too close to actually work that way. And, it doesn’t matter.
One of the nice things about renders is you can do crazy things. Need a part in a color not available? Who cares, use it anyway! No part for what you need? No problem. Shape your own out of what’s available. This is art. Let the freedom of the medium guide you.
Rendering the model.
To be honest, I’d rendered the first version of this model before I did my ostrich. I was trying to figure out how to use the denoising featuring of Blender. My Mac mini is a bit old now, but still quite capable. I’d upgraded the memory and put in an SSD fusion drive a while back to keep it humming. But, that isn’t quite enough.
For those not familiar with ray tracing, the Cycles engine in Blender relies on samples to create an image. Various factors determine how clean the final image looks. Not enough samples and you get a grainy look. In some cases that is fine, but in others it can be quite distracting. Upping the number of samples can help, but it will slow down the render.
To counteract this, Blender introduced a denoising feature. It allows you to reduce the number of samples while eliminating the noise. This version only uses 150 samples instead of the 400-900 used in others. It isn’t perfect, but for my old computer it worked quite well—rendering Ego in a decent amount of time.
Backgrounds are everything.
Mecabricks make it easy to export and render your models in Blender, but they can be quite bland out of the box. The environment is a white box that puts emphasis on the bricks, but doesn’t always fit the build. Rendering Ego against white didn’t make sense.
So, I took to looking for some hi-res pictures of stars. NASA is great for that as their images are public. I found a great equirectangular image of the Milky Way I thought would work well. I tried to use it as an environment techture. Although a pretty good resolution, no matter what I did the stars looked blurry.
For my second attempt, I decided to abandon the environment map and used a plane instead. I found a great picture of the Monkey Head nebula taken by the Hubble telescope. After adding a plane mesh into the scene, I attached the image as a texture.
Don’t forget to check the UV map. The default mesh was square which didn’t match the aspect ratio of the photo. After fixing that, I resized and repositioned the plane until it looked good in the scene. If you place it too far away you may get bit by clipping. Mine is fairly close, so I didn’t have that problem.
I ended up titling the plane because I’d gotten everything in place for the first render. If I’d started the scene with the background, I would have rotated the planet instead. Here is the screenshot of how everything looked before I ran the final render.
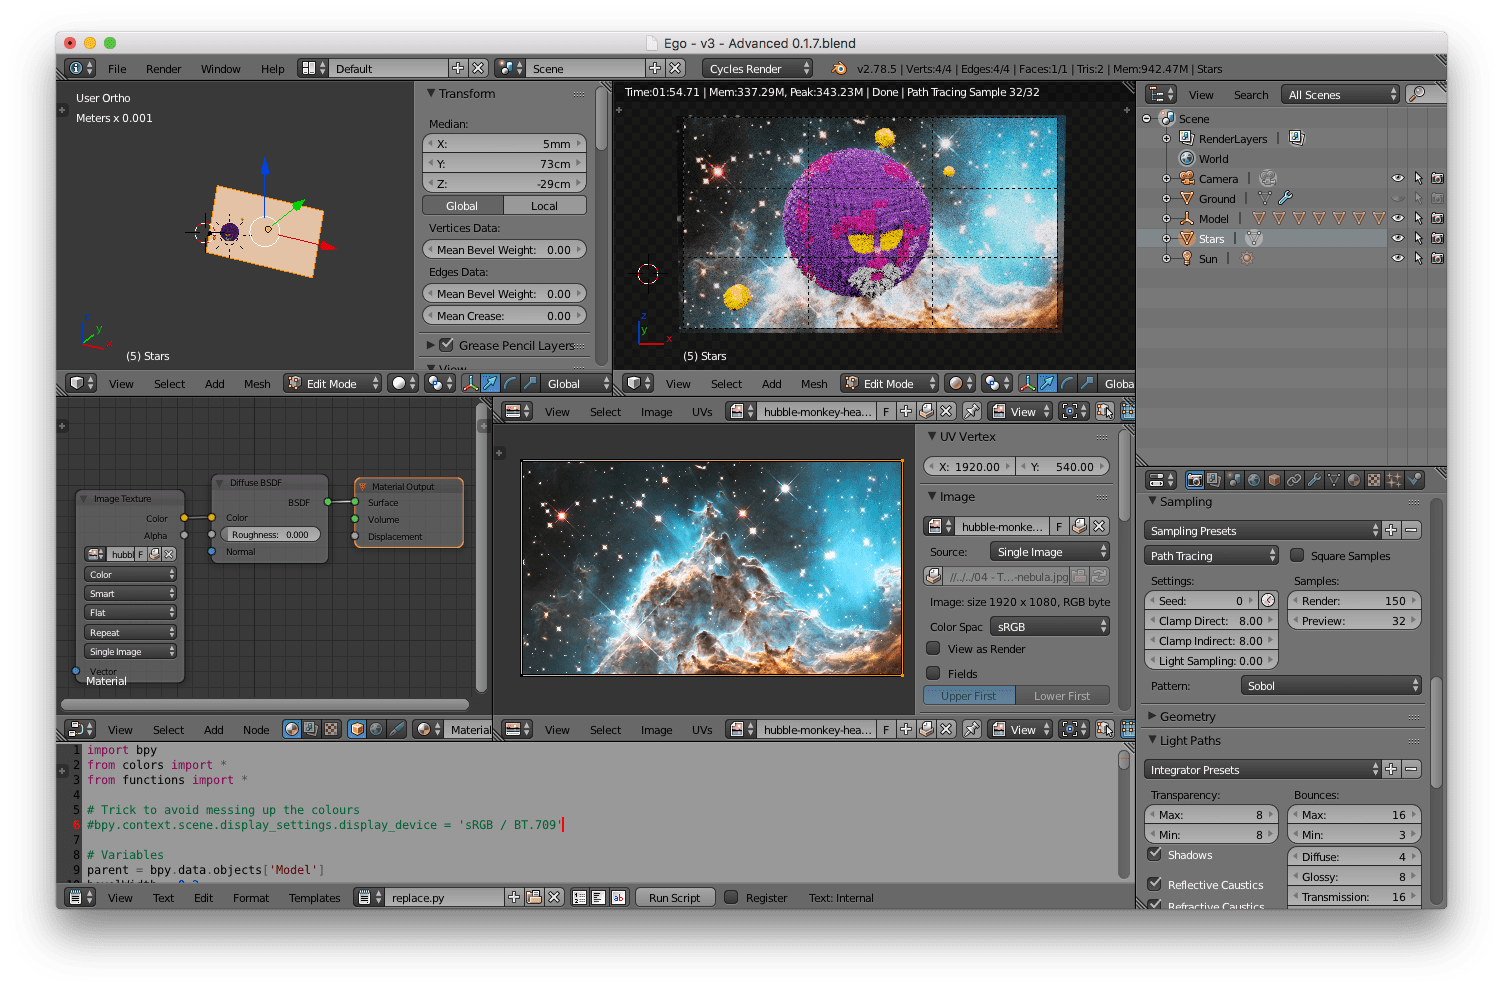
As final note, I added a sun light to the scene during my first render. I cranked up the strength to 20 on that light since I’m using filmic. This ensured that the background was well lit. Depending on your scene, you may need to adjust lighting to get your plane to look right.
And there you have it, Ego the living planet with a nice star and nebula background.