Building a ZX81 Intro Screen for Wolf, Goat, Cabbage
A behind-the-scenes look at designing a ZX81 title screen, from AI misfires to a hand-built solution using simple compression and clever tricks.
When I first converted Wolf, Goat, Cabbage to the ZX81, I wanted to include an intro screen. Sadly, I didn’t get around to it at the time. This month, I finally circled back and it turned into quite the journey.
# Where I ended up.
The final result works. I had a few different ideas in mind, but this one fits the limits of the ZX81’s graphics pretty well. It has a large title, a wolf, a goat, and a very simple cabbage. I’m happy with how it turned out.
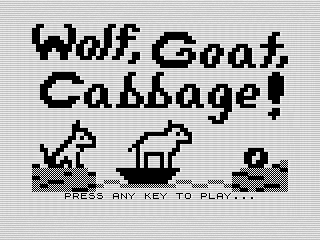 “Final ZX81 intro screen”
# Where the journey started.
As much as I like the final version, I originally planned to build it using generative AI. Back in 2024, when I was updating the puzzle, I spent a lot of time experimenting with different GenAI tools. I had a clear vision and turned it into a prompt… and the result was a complete failure.
The problem wasn’t just the tools—it was the ZX81. Its low resolution and black-and-white graphics make it hard to translate modern AI output into something usable. I could generate 8-bit-style images, but the scale was always off. The wolf, goat, and cabbage never matched, and trying to recombine elements didn’t help.
I still have those attempts, but they’re not worth sharing. The title looked off, and the overall composition just didn’t work. Even revisiting this in 2026 didn’t improve things much. The AI tried, but it couldn’t quite grasp how to work within the ZX81’s character-based graphics.
# Building it myself.
So I went back to basics and built everything by hand. I found a simple online pixel editor and started sketching out the title screen.
I began with the lettering, roughing out shapes and then refining them until they were readable but still chunky enough to fit the system. From there, I built out the scene: two shores, a river, a boat, and the puzzle elements. I redrew parts several times to get the proportions right and experimented with the ZX81’s checkered and gray characters to add a bit of texture.
# Displaying the image.
As a teenager, I probably would have just used a giant PRINT AT and called it good. In fact, I’ve done exactly that in other programs.
This time, I wanted to try something a little different. I built a simple compressed data structure where each letter represents a graphic, followed by a number that repeats it.
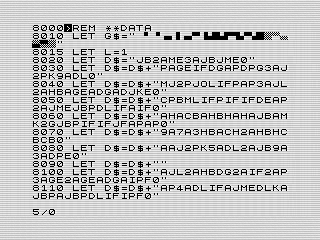 “Compressed DATA for screen”
From there, I wrote a decode routine that walks through the data and renders the screen. It works, but it’s very simplistic and very slow.
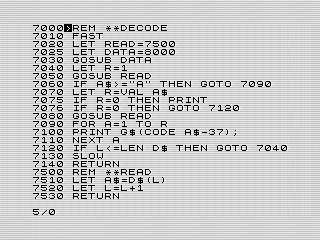 “Decode routine”
# Working around the speed.
Since the decode routine is so slow, I took a different approach. Because the screen only needs to be built once, I can generate it and then SAVE the program.
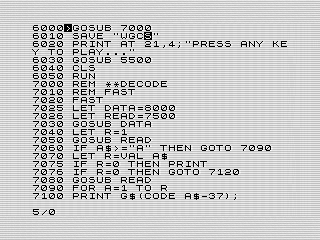 “Saving the generated screen”
The routine uses FAST to help speed things up, but fair warning—it’s still slow. If you want to see it in action, try RUN 7000. If you remove line 7010 or comment out FAST, you can watch it build the screen step by step. It’s not pretty, but it gets the job done.
# And that is it.
I enjoyed building the screen and experimenting with the decode routine, but honestly, the teenage approach might have been better. A big PRINT AT block would probably use less memory and be much faster.
An even better solution would be to poke directly into the display file or use machine code. Maybe that’s a project for another day.
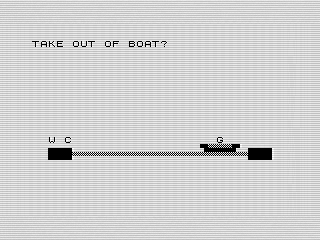 “Gameplay screen”
Outside of the new intro screen, not much else has changed. The puzzle plays the same as before. I considered cleaning up the code, but it didn’t feel worth the effort. Adding variables helps readability a bit, but sometimes it’s easier to just strip things down and leave a few comments.
I’ll leave that part to you—or your code generator—to improve.
Enjoy!
Want to try it out? You can run the program, or view the code if you’d like to see how it works.