Having Fun Learning How to Draw Lines on My ZX81
The Picture Asm is my try at converting an old BASIC program to z80 assembler.
When Simeon Dwyer shared his machine language line drawing routine, I immediately thought of redoing “The Picture.” Most of my z80 assembly has been with my Gem Quest game. I decided it would be a nice diversion to work on something else, even if a quick one. Picture Asm is the result of that diversion.
Setting things up.
Before getting started, I had to convert Simeon’s existing assembly into something I could use. JZeddy doesn’t like capitals, so I lower cased the entire program. I used to using straight assembler, so I cleared all the extra directives and stuff out of the code he shared.
I then did a few test assembles to make sure things were working. That required me adding a few things to compensate for the missing include file. Once done, I had a working version of Simeon’s radar display. I ran it in a couple of different emulators and assemblers to make sure I hadn’t messed anything up.
With the line routines working, I was able to extract what I needed. I built a new template and copied in the line drawing routines. With that done, I was ready to start converting the BASIC version of the picture into assembler. I grabbed the listing and set to work on that.
Converting from BASIC.
Writing The Picture in z80 assembly wasn’t too hard. The original BASIC version a list of LET statements, followed by a GOSUB to the line drawing function. To make things easier, I converted all those lines into a block of data. The BASIC version tried to get clever by reusing data. To save on typing, I would call a routine that moved the from coordinates into the to location. It worked, but made conversion a bit confusing. I actually missed adding a line!
Once I had all the data points in place, it was trivial to write the line drawing in a loop. In fact, that is what I did. Using the bulk copy command, I loaded the four bytes into the coordinates location and called the line drawing function. Here is the main loop and data to give you an idea of how simple it is.
        ld hl,picturedata       ; start of picture data
mainloop:
        ld a,(hl)               ; check if we are at the end of the array
        cp $ff
        jp z,stop               ; all done[br]
        ld de,linecoords        ; coordinates (to)
        ld bc,4                 ; 4 to copy!
        ldir                    ; copy for coordinates
        push hl
        call draw_line          ; and go draw the line!
        pop hl[br]
        jr mainloop             ; loop until out of data![br]
picturedata:   ; start x1,y1 and end x2,y2 - 4 bytes per line
        db 25,38,61,38  ; boat bottom
        db 60,38,55,41
        db 55,41,30,41
        db 30,41,25,39[br]
        db 48,38,48,8   ; mast[br]
        db 48,8,45,11   ; flag
        db 45,11,48,11[br]
        db 48,12,26,35  ; sails
        db 26,35,60,35
        db 59,35,48,12[br]
        db 0,22,38,22   ; horizon
        db 53,22,64,22[br]
        db 4,4,9,4      ; sun
        db 8,4,10,5
        db 9,5,9,7
        db 9,6,7,8
        db 8,8,4,8
        db 4,8,2,7
        db 2,7,2,6
        db 2,6,4,5
        db $ff          ; array done!
The line drawing itself is a bit more complex. But other than adding another symbol for copying the data to, I left it as Simeon provided. For this test, I didn’t tried to optimize the code. Honestly, I didn’t need to.
Make the old picture new again.
Now, although the program is complete, it wasn’t without any problems. For one, Simeon’s routine inverted the Y axis. The first time I ran the program, the picture was upside down. Although I thought it a neat trick, it wasn’t what I envisoned. Fortunately, it also wasn’t hard to fix. All I had to do was subtract all the Y values from my BASIC program from 45—the most the Y axis could be.
Once done, I then found that some things didn’t quite line up. I’m assuming there are some minor differences in how the two line drawing routines work. I tweaked a couple of the coordinates to correct any gaps or mistakes I had. I did find that the Sun looks better in this version.
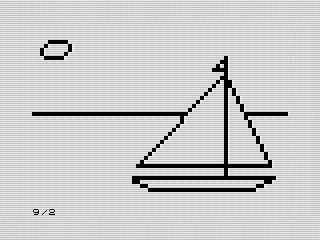 Picture Asm, by Steven Reid, 2021
With the code done, I ran the program a few times to see how it did. As expected, the drawing is an order of magnitude faster than the BASIC version. But it is isn’t instantaneous. There is enough lag that you can see some lines pop into view. Yet it doesn't detract from the program at all.
The BASIC version was so slow. Although it was fun to watch the first time, it got boring watching it over and over again. Given this version runs in less than a second, I decide to exit after the picture is complete. I have some lines in the code commented out where I started to play around with pausing and running agin. In the end, I decided it wasn’t worth it. I didn’t even get to the point of clearing the screen.
Is that all that there is?
Well, the goal for today was to get my program of the month published. I’d spent most of the month hacking away at Gem Quest in my spare time. But working on something else allowed other ideas to start floating into my head.
For one, I thought about taking all my picture programs and making a screen saver with them. It would be easy to expand the loop to a series of data locations. I could even make it random if I so desired.
The other thought I had was to use a double buffer to paint the graphics and then load them into the main display. When thinking about this sail boat scene, I contimplated having the boat and horizon move. It would be a gentle movement, easily covering up any slowness in the line drawing. I still might try that to see how difficult it is.
The real use case I had in mind was for Jet Fighter. Converting that BASIC flight simulator into assembler would make more entertaining. The horizon line is pretty short, allowing the me to use a real line for it. This line drawing should be plenty fast enough. The BASIC version is too slow for Jet Fighter to be playable.
Simeon thought his little line program was too slow to be of use. After trying it out, it is plenty fast for the use cases I had in mind. Plus, it is way faster than what I was using before. With ideas in my head, I know what I’ll be doing for future ZX81 programs. Now, if only I can ever finish the one I’m working on.